How to Make DIY Paper Gift Tags for Any Occasion
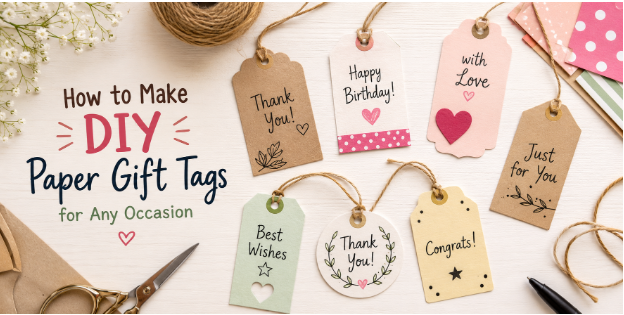
A plain gift tag can make a carefully wrapped present feel less personal. Store-bought tags may not always fit the style, color, or message you want to share. A small handmade detail can change the way a gift feels from a store shelf or package.
Still, a simple DIY paper gift tag gives you a chance to add colors, shapes, and designs that match any event. The process does not need many supplies, and it can be a fun craft for different ages. This guide shares the steps, supplies, and creative ideas needed to make paper gift tags for birthdays, holidays, and special moments. You can create unique tags that bring more care to each present.
Why Make DIY Paper Gift Tags?
DIY paper gift tags add a handmade detail to any present. A simple piece of paper can become a small decoration that makes your gift feel more thoughtful. These tags are easy to create and can match different styles, colors, and events. Making your own tags also gives you more control over the design. You can choose the shape, size, colors, and decorations that fit your gift. Each tag can have its own style instead of looking the same as every other tag.
Add a Personal Touch to Every Gift
A handmade gift tag adds a special detail that store-bought tags may not have. You can write the receiver’s name, add a short note, or create a design that matches their personality. Even a small drawing or handwritten message can make the gift feel more meaningful. DIY tags work well for gifts shared with family, friends, teachers, or coworkers. A custom tag shows that you spent time creating something just for them. It turns a simple wrapping idea into a small keepsake that they may want to save.
Save Money on Gift Wrapping
Gift wrapping supplies can become expensive, especially during busy gift-giving seasons. DIY paper gift tags help reduce extra costs while still adding a nice finish to your presents. You can make many tags from a few sheets of cardstock or scrapbook paper. Basic tools like scissors, glue, pens, and hole punches are often enough to create different designs. This makes the project a budget-friendly choice for anyone who enjoys handmade crafts.
Use Leftover Craft Supplies
DIY paper gift tags are a great way to use materials already at home. Small paper pieces, fabric scraps, ribbons, buttons, and stickers can all become part of your designs. Leftover supplies from past projects do not need to sit unused in a drawer. They can add color and texture to your tags. Mixing different materials can help create tags with different looks for many gifts.
Match Any Holiday or Celebration
One of the best parts of making your own gift tags is the freedom to choose any theme. You can create soft colors for baby showers, bright designs for birthdays, or seasonal patterns for holidays. The tag design can match the wrapping paper, gift box, or event style. Simple changes like adding flowers, stars, hearts, or seasonal shapes can create a new look for each occasion. DIY tags also work for everyday moments. A small thank-you gift, a care package, or a surprise present can all have a handmade paper tag attached.
Create Fun Projects for the Whole Family
Making paper gift tags can become a fun activity for the whole family. Kids can enjoy drawing, coloring, and adding decorations, while adults can help with cutting and arranging designs. This craft does not require many supplies or advanced skills. Everyone can create tags in their own style. Family members can make a set together and use them for upcoming gifts. Creating tags as a group also adds a personal memory to the project. Each person can leave their own creative mark on the finished designs.
Supplies You Will Need
Making DIY paper gift tags does not require many tools. A few basic craft supplies can help you create tags that match any gift style. Gather everything before you start so the process feels simple and smooth.
Cardstock or Heavy Paper
Cardstock is a great choice for DIY gift tags because it is thicker than regular paper. It holds its shape and feels more durable on gifts. Pick a color or pattern that fits the occasion. Plain white, soft colors, or bright shades can all work well.
Scissors or Paper Trimmer
Scissors help you cut out simple tag shapes by hand. A paper trimmer can help create straight edges and clean cuts. Choose the tool that feels easiest for your project. Both options work well for making neat gift tags.
Hole Punch
A hole punch creates a small opening for adding ribbon, twine, or string. A standard single-hole punch works well for most paper tags. Place the hole near the top edge so the tag stays strong.
Ribbon, Twine, or String
Ribbon, twine, and string add the finishing touch to your gift tags. They help attach the tag to gift bags, boxes, or wrapped presents. Choose a style that matches the paper and the event.
Markers, Pens, or Letter Stamps
Writing tools help you add names, messages, or small designs to your tags. Markers create bold colors, while pens give a simple look. Letter stamps can help you create neat words and repeated designs.
Decorative Stickers and Embellishments
Stickers, small paper shapes, and other decorations can give your tags extra detail. Use items that match the theme of your gift. A few small touches can make a plain tag look more personal.
Glue and Double-Sided Tape
Glue and double-sided tape help keep decorations and layers in place. Tape is useful for adding paper pieces without leaving a mess. Glue works well for stickers, cutouts, and other lightweight items.
Printable Gift Tag Templates (Optional)
Printable gift tag templates can save time and help you create matching designs. They are useful for making several tags with the same shape and style. You can print a template, cut it out, and add your own details.
How to Make DIY Paper Gift Tags for Any Occasion
DIY paper gift tags add a handmade touch to any present. Store-bought tags are useful, but creating your own gives you more freedom with colors, shapes, and designs. You can make tags that match birthdays, holidays, baby showers, weddings, or simple thank-you gifts.
This project does not need many supplies. A few sheets of paper, scissors, decorating tools, and some ribbon can help you create beautiful tags at home. Each step gives you a chance to add your own style and make the gift feel more thoughtful.
Step 1: Choose a Gift Tag Shape
The shape of your gift tag sets the style for your project. Start with a basic shape that is easy to cut, such as a rectangle or square. These shapes work well for names, short notes, and simple designs. You can also try other shapes to match the occasion. Heart shapes work well for Valentine’s Day or wedding gifts. Round tags can give a soft look for baby shower gifts. Star shapes can add a fun detail to birthday presents. Use a pencil to draw your shape before cutting. This helps you adjust the size and create several tags that look the same. A simple paper template can also save time if you plan to make many tags.
Step 2: Select Your Paper or Cardstock
The right paper helps your gift tag look neat and stay strong. Thin paper may bend or tear, especially with heavier decorations. Cardstock is a good choice because it has more strength and holds its shape. Choose colors that match your wrapping paper or the event theme. Soft colors can create a simple and clean look. Bright colors can make the gift feel fun and cheerful. Patterned paper can also add extra detail without needing many decorations. You can use recycled paper, scrapbook paper, or leftover craft paper for this project. Mixing different paper styles can create a collection of tags with different looks.
Step 3: Cut Out the Gift Tags
After choosing your design, mark the tag shape on your paper or cardstock. A ruler helps create straight lines for square or rectangle tags. Cut slowly around the edges to keep the shape clean. A craft punch or cutting tool can help create matching tags quickly. If you make several tags at once, use the first finished tag as a guide for the others. Take a moment to check each tag after cutting. Trim any uneven edges so every piece looks ready for decorating. Clean edges can make a simple tag look more polished.
Step 4: Decorate the Front of the Tag
The front of the tag is where you can add your creative style. Use markers, colored pencils, stickers, stamps, or small paper pieces to create your design. A simple pattern can look just as nice as a detailed one. Add the person’s name, a holiday symbol, or a small drawing. For a birthday gift, you can add balloons, candles, or fun shapes. For a winter gift, snowflakes and simple seasonal designs can create a fitting look. Try to leave enough open space so the tag does not look crowded. A balanced design makes the message easier to see and keeps the tag looking clean.
Step 5: Write a Personal Message
A handwritten message can make a gift feel more personal. Write a short greeting, the receiver’s name, or a few kind words on the back of the tag. Use a pen or marker that is easy to read. Match the writing style with the gift. A playful style may fit a child’s gift, while a simple style may work better for a formal event. Let the ink dry before handling the tag. This helps prevent smudges and keeps your message clear.
Step 6: Punch a Hole for the Ribbon
A small hole at the top of the tag gives you a place to add ribbon or string. Use a hole punch to make an even opening. Place the hole near the top center or corner based on the shape of your tag. Leave enough space around the hole so the paper stays strong. A hole placed too close to the edge may cause the tag to tear. For a different look, you can punch two small holes and add ribbon through both. This style works well for larger tags or heavier paper.
Step 7: Add Ribbon, Twine, or String
Choose a ribbon, twine, or string that matches your gift design. Thin ribbon can create a soft look, while twine gives a simple handmade feel. Colorful string can add a fun detail to party gifts. Cut a piece that is long enough to tie around the present. Thread it through the hole and secure it with a knot or bow. Make sure the tag hangs comfortably and can be seen easily. You can also add small charms, beads, or extra paper details to the string for more decoration. Keep the added pieces light so the tag stays easy to use.
Step 8: Attach the Gift Tag to Your Present
The final step is attaching your handmade tag to the gift. Tie it around the ribbon, tape it to the wrapping paper, or place it on the gift bag handle. Check that the name and message are easy to see. A well-placed tag helps the receiver know who the gift is for and adds a special handmade detail. DIY paper gift tags are a fun craft that can fit any occasion. With simple materials and a little creativity, you can create tags that make your gifts feel more personal.
DIY Paper Gift Tag Ideas
DIY paper gift tags are a fun way to add a handmade touch to any present. A plain gift can feel more thoughtful with a small tag made with care. Paper tags are simple to create and can match birthdays, holidays, family events, and special moments. You can use cardstock, scrapbook paper, kraft paper, or leftover craft supplies to create different styles. Add names, short messages, drawings, stickers, stamps, or ribbons to make each tag fit the person and the occasion.
Birthday Gift Tags
Birthday gift tags can bring extra color and joy to a wrapped present. Use bright paper, fun patterns, or playful shapes like balloons, cakes, stars, and candles. A handmade tag with the birthday person's name can make the gift feel more personal. Try adding a small pocket to the tag and place a tiny note inside. You can also create a photo tag with a favorite picture for a special memory. For kids' gifts, simple cartoon designs and colorful decorations can make the wrapping more exciting.
Christmas Gift Tags
Christmas gift tags can make holiday presents look warm and festive. Choose paper in classic holiday colors or use patterns with snowflakes, trees, ornaments, and other seasonal designs. A handwritten message can add a sweet detail to each gift. Try making layered tags by adding smaller paper shapes on top of the base tag. Ribbons, buttons, and twine can also add texture. Handmade Christmas tags can be saved and reused as small decorations for future holidays.
Valentine's Day Gift Tags
Valentine's Day gift tags are a lovely way to add a caring message to a present. Heart shapes, soft colors, and romantic patterns work well for this occasion. Add a short note that shares your feelings or a kind message. You can create tags for gifts like chocolates, flowers, handmade crafts, or small surprises. A simple paper tag with a handwritten message often feels more meaningful than a printed label.
Mother's Day Gift Tags
Mother's Day gift tags can show love through simple handmade details. Use flower designs, soft colors, or family-themed decorations to create a warm look. Add a message that thanks your mom for her care and support. A child can also create a handmade tag with drawings or a handwritten note. These small details can become a sweet memory that lasts beyond the gift itself.
Father's Day Gift Tags
Father's Day gift tags can have a clean and personal style. Use colors and designs that match your dad's interests. Sports themes, outdoor designs, tools, cars, or simple patterns can work well. Add a short message that shares appreciation. A handmade tag attached to a wallet, shirt, book, or hobby gift can make the present feel more thoughtful.
Baby Shower Gift Tags
Baby shower gift tags can add a sweet detail to gifts for new parents. Use soft colors, cute animals, baby bottles, stars, clouds, or simple shapes. Pastel paper and gentle patterns create a lovely style. Add the baby's name, a wish for the family, or a short message. These tags can also become part of a baby memory box after the celebration.
Wedding Favor Tags
Wedding favor tags help add a personal detail to guest gifts. Match the tag colors with the wedding theme and add the couple's names or wedding date. Simple designs can work well with candles, treats, small jars, or handmade favors. You can use elegant paper shapes, lace details, ribbons, or handwritten text. Each guest can receive a small gift with a special message attached.
Thank You Gift Tags
Thank you gift tags are a simple way to show kindness. Use clean designs with messages like “Thank You” or “With Appreciation.” Add colors and decorations that match the gift. These tags work well for teacher gifts, party favors, customer gifts, or handmade presents. A small note can make the receiver feel valued.
Graduation Gift Tags
Graduation gift tags can celebrate a student's hard work and success. Use school colors, graduation caps, books, stars, or diploma designs. Add the graduate's name and a message of encouragement. These tags can be used on money gifts, gift cards, books, or personal presents. A handmade tag adds a special touch to this important milestone.
Halloween Gift Tags
Halloween gift tags can make treat bags and party gifts more fun. Use black, orange, purple, or white paper with spooky designs. Pumpkins, ghosts, spiders, bats, and candy shapes are great choices. Kids can help decorate these tags with drawings or stickers. They are a fun addition to candy bags, classroom treats, and Halloween party favors.
Easter Gift Tags
Easter gift tags can bring a fresh spring style to gifts. Use pastel colors, bunny shapes, eggs, flowers, and simple patterns. These tags look great on baskets, candy bags, and small surprises. Add a cheerful message or the person's name for a personal touch. Handmade Easter tags can also become part of a family craft activity.
Rustic Kraft Paper Gift Tags
Rustic kraft paper gift tags have a simple handmade style. Their natural color works well with twine, wooden details, dried plants, and simple stamps. They are a good choice for gifts with a cozy or handmade feel. Add handwritten names or small drawings to keep the design natural. These tags fit well with homemade gifts, holiday presents, and party favors.
Floral Gift Tags
Floral gift tags add a soft and colorful detail to presents. Use flower drawings, pressed flowers, floral paper, or painted designs. Different flower styles can match different events and seasons. A small flower border or a single flower design can create a pretty look. These tags work well for birthdays, weddings, thank-you gifts, and spring celebrations.
Minimalist Black and White Gift Tags
Minimalist black and white gift tags have a simple and modern style. Use plain paper, clean lines, and short messages. A small border or simple icon can add detail without making the design feel busy. These tags are great for professional gifts, wedding favors, and simple gift wrapping. Their clean style works with many types of presents.
Kids' Coloring Gift Tags
Kids' coloring gift tags turn a simple craft into a fun activity. Create tags with blank spaces, simple drawings, or outlines that children can color. They can use crayons, markers, or colored pencils to decorate each tag. These tags are great for family gifts, classroom projects, and holiday activities. Each child can create a different design, making every gift tag special.
Tips for Making Beautiful DIY Paper Gift Tags
Creating paper gift tags gives your presents a personal touch. Small design choices can change the whole look of your tags. A few simple details help create tags that match the gift and the moment.
Choose Colors That Match the Gift Wrap
Pick colors that work well with your gift wrap. A tag with matching shades can make the whole package look neat and well planned. Soft colors work well for simple gifts, while bright colors add a fun feel to birthday or holiday presents. You can use the same color family as the wrapping paper or add a small contrast. A white tag on dark wrapping paper can stand out. A pastel tag can create a soft look for baby showers or weddings.
Mix Different Paper Textures
Different paper textures can make your gift tags more interesting. Try using smooth cardstock, kraft paper, patterned paper, or handmade paper. Each type gives the tag a different style. A mix of textures can help simple designs look more special. A rough paper layer under a smooth top layer can create a nice balance. Choose papers that feel good and match the theme of your gift.
Keep the Design Simple
A clean design often creates a beautiful result. Too many colors, shapes, or decorations can make the tag look crowded. Start with one main idea and build around it. A simple border, a small pattern, or a short message may be enough. Leave some empty space so the tag looks clear and easy to read.
Layer Paper for Extra Dimension
Paper layers can add depth to your DIY gift tags. Cut smaller shapes from different papers and place them on top of each other. This creates a raised look without needing many supplies. Try adding a circle, heart, flower, or other simple shape as a top layer. Small layers can turn a plain tag into a creative piece that stands out on a gift.
Use Hand Lettering for a Unique Look
Hand lettering can give your gift tags a personal style. Write the name of the person, a short message, or a holiday greeting by hand. Each tag will feel more special because it has a personal detail. You do not need perfect handwriting. Simple letters with clean lines can look great. Practice on scrap paper before writing on the final tag.
Add Small Embellishments Without Overcrowding
Small decorations can add charm to paper gift tags. Try adding ribbons, tiny stickers, stamps, buttons, or small paper shapes. These details can match the theme of your gift. Keep the decorations balanced. A few small pieces can create a nice finish. Too many items may hide the design and make the tag harder to read. A simple touch often creates the best look.
Common Mistakes to Avoid
Making DIY paper gift tags is a fun craft project, but a few small mistakes can affect the final look. Simple choices like paper type, cutting, and placement can help create tags that look neat and last longer.
Using Paper That Is Too Thin
Thin paper may bend, tear, or lose its shape easily. Gift tags often get handled, tied, and moved around. Choose thicker cardstock or strong paper that can hold its form.
Cutting Uneven Shapes
Rough edges can make a gift tag look messy. Take your time while cutting and use sharp scissors or a paper cutter for cleaner lines. A simple shape with smooth edges can give a better finish.
Adding Too Many Decorations
Extra details can make a tag feel crowded. Too many stickers, ribbons, or small pieces may hide the main design. Pick a few decorations that match the style of the tag.
Forgetting to Leave Space for a Message
A gift tag needs room for a short note, name, or greeting. Plan the design before adding decorations. Keep a clear area so the message stays easy to read.
Using Weak Adhesives
Glue that does not hold well can cause decorations to fall off. Choose an adhesive that works well with paper and the materials you add. Test small pieces first to make sure they stay in place.
Making the Hole Too Close to the Edge
A hole near the edge can tear the paper after the tag is attached. Leave enough space around the hole for extra strength. A small detail like this can help the tag stay secure on a gift.
How to Store DIY Paper Gift Tags
Making DIY paper gift tags takes time and care. Proper storage helps keep them neat and ready for future gifts. A good storage method also keeps your tags from getting bent, damaged, or lost.
Keep Tags Flat in Storage Boxes
Store paper gift tags in a flat box to help them keep their shape. A small craft box, folder, or drawer organizer works well for this purpose. Place tags in a single layer or add thin sheets of paper between stacks to prevent marks or folds. Avoid placing heavy items on top of your tags. Too much pressure can leave creases or damage small details like cut shapes and decorations.
Organize by Occasion
Sorting tags by occasion makes it easier to find the right design later. Create sections for birthdays, holidays, weddings, thank-you gifts, and other events. You can use small labels on each section to save time. This simple step helps you pick a matching tag without searching through your whole collection.
Protect Finished Tags from Moisture
Paper can get damaged by water and humidity. Keep your gift tags in a dry storage area away from sinks, windows, or damp spaces. A sealed container with a lid can add extra protection. This helps keep the paper clean and prevents colors, ink, or decorations from getting ruined.
Store Leftover Supplies Together
Keep extra paper, ribbons, stickers, stamps, and other craft supplies in the same storage area. Use small containers or bags to separate each item type. Having your supplies in one place makes future projects easier to start. You can quickly find what you need and create new gift tags without buying extra materials.
Final Notes
DIY paper gift tags are a simple way to add a handmade detail to any present. With basic supplies like cardstock, scissors, ribbons, and pens, you can create tags that fit many events and gift styles. Each tag gives you a chance to add your own design, message, and personal style. Small details like colors, shapes, and decorations can help turn a plain gift into something more thoughtful. Take time to enjoy the craft process and try different ideas. A handmade paper gift tag can be used for birthdays, holidays, family events, and everyday gifts. These small creations can also become keepsakes that hold special memories.
FAQs
What paper is best for DIY gift tags?
Cardstock or heavy paper is a good choice for DIY gift tags. It holds its shape better than thin paper and can support decorations like ribbons, stickers, and small paper pieces.
Can kids make DIY paper gift tags?
Yes, kids can enjoy making paper gift tags. They can draw, color, add stickers, and create their own designs with help from adults for cutting and arranging.
How can I make gift tags look more personal?
You can add names, handwritten notes, drawings, stamps, or decorations that match the person or event. Small details can give each tag its own style.
What supplies do I need to make paper gift tags?
Basic supplies include cardstock or paper, scissors, a hole punch, ribbon or string, pens, markers, glue, and decorations. Printable templates can also help create matching tag shapes.
Can DIY paper gift tags be reused?
Yes, handmade gift tags can be saved and used again. Store them flat in a dry place and organize them by occasion to keep them ready for future gifts.
How can I store finished paper gift tags?
Keep your tags in a flat box, folder, or drawer organizer. Protect them from moisture and avoid placing heavy items on top to prevent bends or damage.