How to Make a Simple Shadow Box for Halloween
Many homes feel empty during Halloween because store decorations often look the same and do not create a personal festive touch anywhere. It can make rooms feel dull and less festive, leaving little excitement for guests or family who visit during the season each year. The solution is a simple Halloween shadow box that adds a handmade look using easy materials and clear design steps. This project helps you build a small scene that fits any shelf or table and brings a warm Halloween feel. We will go through what a shadow box is, what you need, and how to put it together step by step. Let’s start with the basics.
What Is a Halloween Shadow Box?
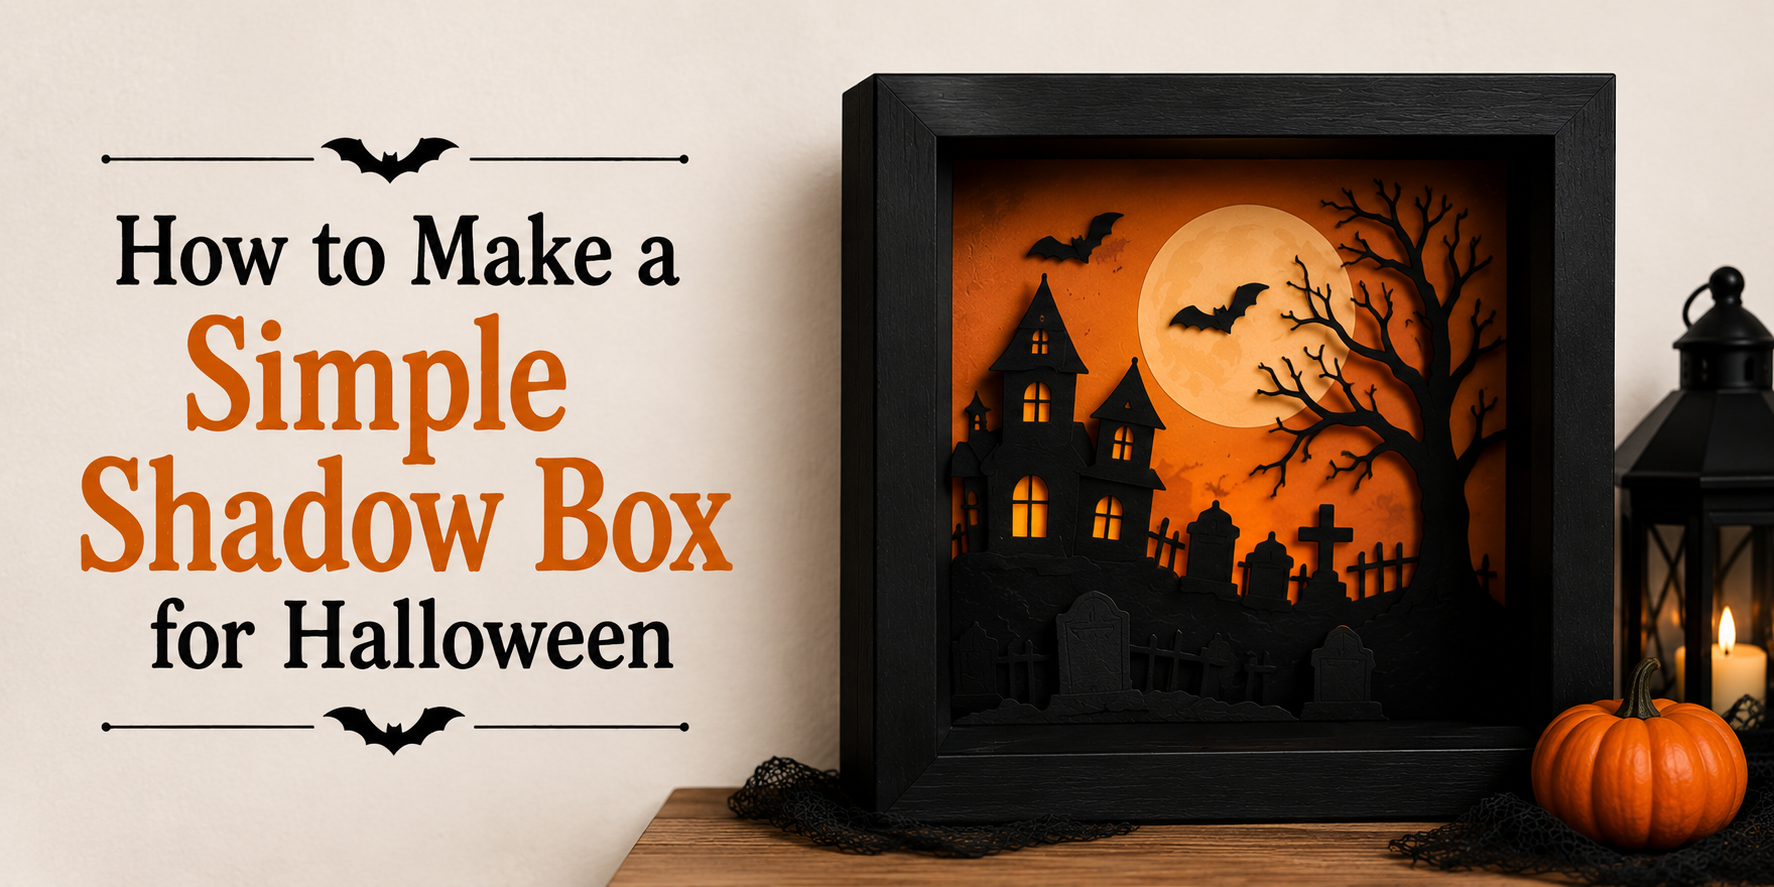
A Halloween shadow box is a small decorated box with a deep frame. It shows a tiny scene inside. The scene often has Halloween items like paper bats, ghosts, or pumpkins. People use it to decorate tables, shelves, or walls. The box creates depth by placing items at different levels. This makes the scene look more real. A shadow box can be made from a simple frame or a cardboard box. The inside becomes a space for creative Halloween designs. Each box can look different based on the items inside.
Why Make a Halloween Shadow Box?
A Halloween shadow box brings a small scene to life. It fits inside a frame or box. You can place it on a shelf or table. It adds a seasonal look to any room. This project uses basic materials. Paper, cardboard, and glue work well. Some people also use paint or small craft items. The steps stay simple and easy to follow. A shadow box also lets you show your own style. You can choose friendly or spooky designs. Each box can look different, even with the same materials. Many people like this project because it feels calm to make. It also works well for home decoration or a school craft.
Materials and Tools Needed
Making a shadow box starts with gathering the right items so the structure stays steady and the Halloween design looks clear and balanced. Each item has a role in shaping the box, cutting the space, and adding details that stand out under light. Keeping everything ready before starting helps the process move in a steady way from one step to the next.
Basic Supplies
A simple cardboard box works as the base where all the Halloween details will sit, while black paper or black paint creates a dark background that helps shadows stand out more clearly, and scissors, glue, a pencil, and a ruler help with marking, cutting, and fixing each part in place so the box keeps a clean shape and the design stays neat as you build it.
Recommended Crafting Tools
A craft knife helps create sharp window cuts in the cardboard so light passes through clean edges, while a cutting mat protects the surface below during cutting work, and a hot glue gun keeps decorations firmly attached, along with a paintbrush that spreads paint evenly across the box and tape that helps hold parts in place during adjustments so everything stays stable while working.
Optional Decorative Additions
Halloween stickers can fill empty spaces with quick themed designs, fake cobwebs can stretch across corners for texture, small plastic bats or pumpkins can sit inside the box to build a scene, glitter can add a light sparkle under illumination, and LED tea lights can sit at the base to give a soft glow that brings the shadow effect to life in a simple and clear way.
Choose a Halloween Theme
A Halloween shadow box starts with one clear theme. The theme sets the mood and guides the look of the craft. Keep it simple so each detail stands out inside the box.
A haunted house theme uses a dark paper house shape. Cut windows and doors. Place it inside the box to create depth. Add small paper lights in the windows. Use black and gray paper for a night scene. The house becomes the main focus.
Spooky Forest Scene
A forest theme uses tall tree shapes. Cut thin trunks from black paper. Place them at different depths inside the box. Add light gray paper for fog near the ground. Keep the background plain. The layers give a quiet, eerie feel.
Bats and Moon Silhouettes
A night sky theme uses a large moon shape. Cut a circle from white or yellow paper. Place it on the back wall. Add bat shapes flying across the scene. Use black paper for strong contrast. Place them at different heights to show motion.
Pumpkin Patch and Jack-o'-Lanterns
A pumpkin patch theme uses orange paper pumpkins. Cut different sizes for variety. Place them at the bottom of the box. Draw simple faces on some pumpkins. Add green stems using small paper pieces. Layer them to build depth in the scene.
Plan Your Shadow Box Layout
A good shadow box starts with a clear plan. This step helps you avoid confusion later. It also keeps your design balanced and neat.
Sketch Your Design
Start with a simple sketch on paper. Draw the frame shape first. Then add where each piece will go inside. Keep the shapes basic. Circles, squares, and simple icons work well for Halloween themes like bats, pumpkins, or ghosts. A rough sketch is enough. You are not aiming for perfect art. The goal is to see the full idea before you start cutting or gluing.
Create Layer Depth
Layer depth gives your shadow box a 3D look. Place some items closer to the front and others toward the back. This makes the scene feel more alive. Use small foam pieces or folded paper behind some shapes. That small gap creates space between layers. A pumpkin in front with bats behind it can add a strong effect.
Select Colors and Backgrounds
Pick colors that match a Halloween mood. Black, orange, purple, and white work well together. Keep the palette simple so the design does not feel crowded. For the background, use plain paper or light texture sheets. A dark background can make lighter shapes stand out more. Try different combinations on your sketch before you start building.
Assemble the Shadow Box
Lay out all your pieces on a clean table. Keep the frame nearby so you can test the fit as you go. Start with the background. Place the back layer inside the box. Make sure it sits flat and does not move. Next, add your main shapes. These are the items that give the box depth. Place them one by one. Leave small gaps between layers so the depth shows clearly.
Use glue or double-sided tape to hold each piece. Press each item down for a few seconds so it sticks well. Check the view from the front often. Adjust any piece that looks off or blocks another layer. Add small details last. These small pieces bring the Halloween theme to life without crowding the scene. Close the frame and make sure everything stays in place. Your shadow box is now ready to display.
Add Lighting Effects (Optional)
Lighting can change the whole look of your shadow box. It makes the scene stand out more, especially in the dark. Small LED lights work best for this. They stay cool and last long. You can place them behind the paper layers or along the inside edges of the box. This helps create depth and soft glow across the design. Battery-powered fairy lights are another easy choice. They are thin and flexible. You can shape them around parts of the scene or tuck them behind cutouts.
Try placing lights in different spots. A light behind a moon cutout gives a soft glow effect. A light near a haunted house shape can make windows look alive. Keep the lighting light and balanced. Too many lights can wash out the details. A few well-placed points of light often work better than a bright full setup. Test the box in a dim room. This helps you see how the shadows and lights work together. Adjust the placement until the scene feels right.
Place the Design Inside the Frame
Place the background design inside the shadow box frame. Lay it flat against the back panel. Keep the edges straight. This helps the scene look clean. Add the main Halloween cutouts on top of the background. Place each piece one at a time. Leave small gaps between layers. This gives depth inside the box.
Use glue or double-sided tape to hold each piece. Press each part gently so it stays in place. Avoid shifting the design while working. Check the spacing from the front of the frame. Make small changes so nothing feels crowded. Keep the focus on the center of the scene. Close the frame once everything sits in the right spot. The shadow box is now ready to display.
Decorating and Displaying Your Halloween Shadow Box
Start by choosing a spot for your shadow box. A table, shelf, or desk works well. Keep the surface clean so the box stands out. Add your main Halloween scene inside the box. Small paper cutouts, printed images, or tiny props work well. Place the tallest items at the back. Put smaller pieces in front to create depth.
Use Halloween colors to set the mood. Black, orange, purple, and white work well together. Spread colors across the scene so it looks balanced. Add small details to make the box feel complete. Try paper bats, mini pumpkins, or ghost shapes. Keep spacing even so nothing looks crowded.
Light plays a big role in the display. Soft LED lights or fairy lights can sit behind or inside the box. The glow brings the scene to life without overpowering it. Finish by placing the shadow box where it can be seen easily. A steady spot helps keep it safe and visible during the season.
Read also: How to Make a DIY Shadow Box Frame
Tips for a Better Shadow Box
A few small choices can make a big difference in the final result. A clean design, good color selection, and careful assembly help your Halloween shadow box look neat and eye-catching. These tips can help you create a display that stands out without adding extra work.
Keep Designs Simple
Simple designs are often the most effective. Choose a few Halloween shapes that fit your theme. Too many details can make the shadow box look crowded. A clean layout helps each layer stand out and keeps the overall design easy to enjoy.
Use Contrasting Colors
Color contrast helps bring depth to your shadow box. Pair dark backgrounds with lighter shapes, or use bright Halloween colors against black layers. This makes each element easier to see and adds more visual interest to the finished piece.
Avoid Common Crafting Mistakes
Take your time while cutting and placing each layer. Uneven edges and misaligned pieces can affect the final look. Leave enough space between elements so the design does not feel packed. A neat arrangement gives your shadow box a polished appearance.
Final Verdict
Your Halloween shadow box is now ready to display. It brings a small seasonal scene into your space. The design can fit many themes. You can switch pumpkins, bats, or haunted houses with new paper shapes. Colors can also change to match a new look.
Careful cutting and clean placement help the box stay neat. Simple layouts make each part easier to see. Each layer adds a bit of depth to the scene. Soft lights can make the display stand out in a quiet way. A shelf or table works well for showing it. The same box can be used again each year with small changes.
FAQs
What is a Halloween shadow box?
A Halloween shadow box is a deep frame with a small scene inside. It uses paper shapes and simple decorations. The scene shows Halloween items like bats, pumpkins, or ghosts.
What materials are used for a shadow box?
Cardboard works as the base. Paper, glue, scissors, and tape help build the design. Paint and small craft items add detail. LED lights can add a soft glow.
How long does it take to make one?
Most shadow boxes take a few hours. The time depends on the design size and detail level. Simple designs take less time.
Can kids make a shadow box?
Kids can make this craft with basic tools. Adult help works well for cutting or glue steps. Paper shapes and safe materials keep the project manageable.
How does lighting affect the design?
Small lights change the look of the scene. They create depth and soft shadows. Battery LED lights work well inside the frame.
How can a shadow box be stored?
A dry, flat place keeps the box safe. A sturdy shelf or closed container helps protect the design. Careful storage keeps the shape and details in good condition.