How to Create a Layered Nativity Shadow Box for the Holiday
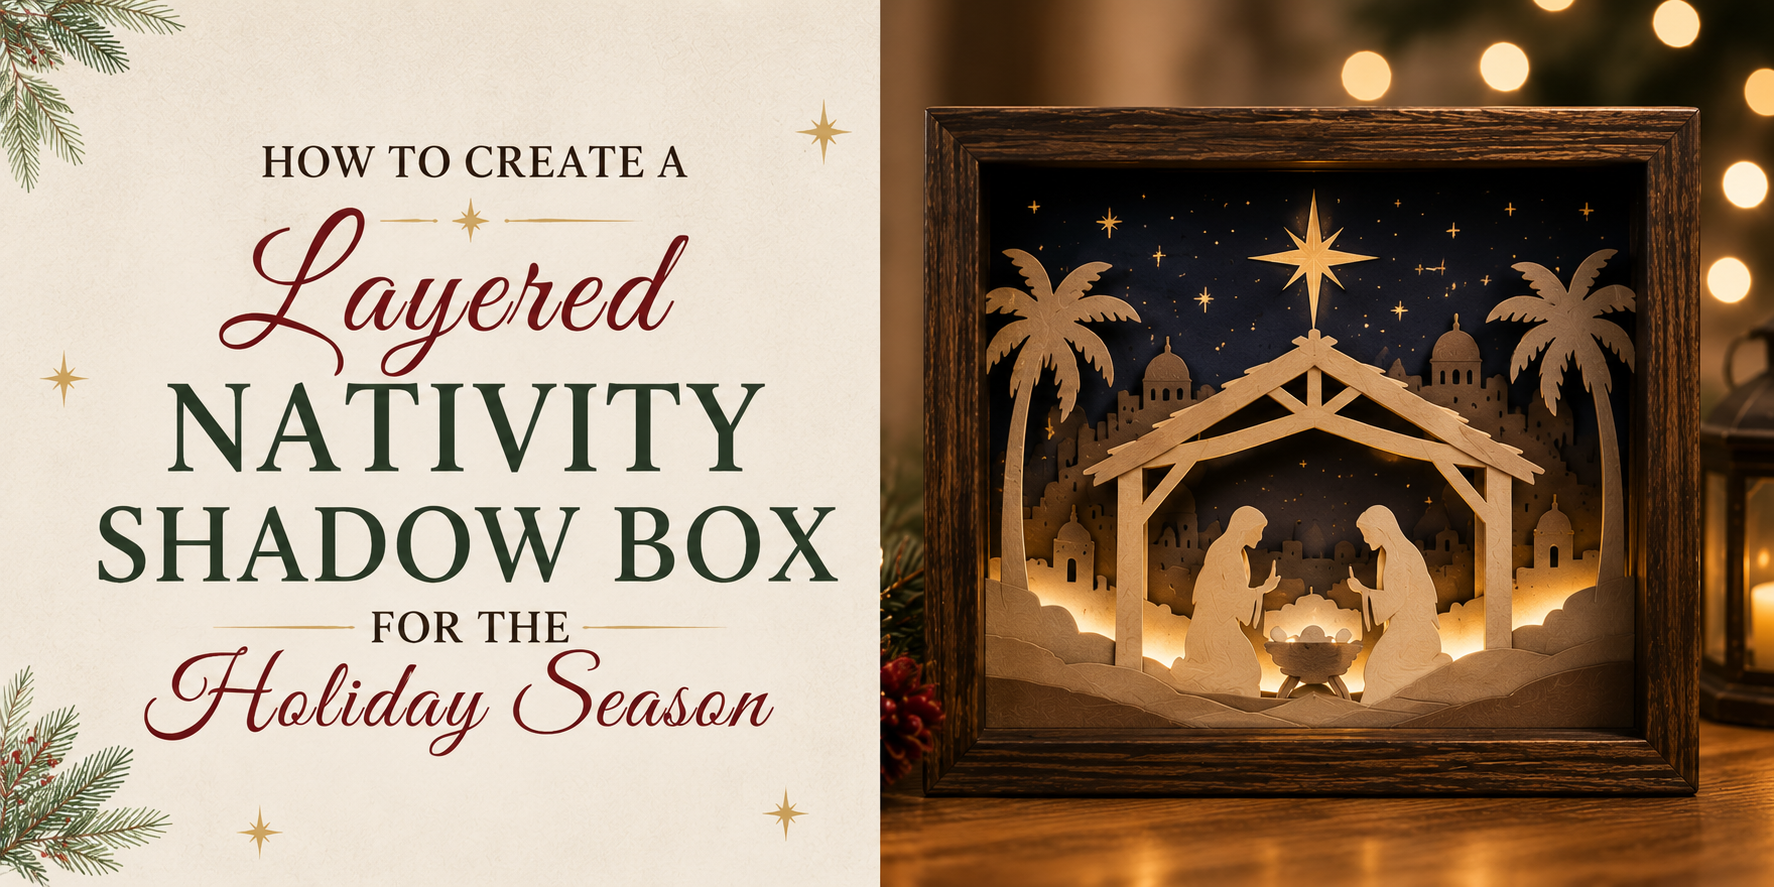
Soon the holiday season brings a need for warm and meaningful home decor. Many people want something handmade that shows faith and tradition in a simple way. Store bought decorations can feel plain and the same in many homes. Then a layered nativity shadow box offers a better way to decorate for Christmas. It uses stacked layers to create depth and brings the Nativity scene to life in a calm and meaningful display. This guide will show the steps, materials, and simple methods to build your own at home. It helps you make a holiday piece that feels personal and lasting. Each detail adds meaning to your festive space. Start with simple materials.
What Is a Layered Nativity Shadow Box?
A layered nativity shadow box is a framed scene with depth. It shows the nativity story using stacked paper or cardstock layers. Each layer sits behind the other. This creates a 3D look inside a frame. The design often includes figures like Mary, Joseph, and baby Jesus. Some versions add stars, animals, or a stable. Each piece is placed at a different depth. This builds a sense of space inside the box.
Light and shadow play a big part. The front layers cast soft shadows on the back layers. This makes the scene feel more alive and detailed. The frame holds everything in place. It also helps protect the artwork. People often hang it on a wall or place it on a shelf during the holiday season. This craft works well with paper cutting or digital design prints. It can be simple or very detailed based on the style you choose.
Why This Christmas Craft Is So Popular
This Christmas craft draws attention for its simple design and warm look. The layered nativity shadow box shows depth with paper layers placed one behind another. People enjoy it because it fits many home styles. It works well on shelves, mantels, and walls. The soft shadows give a calm holiday feel.
It also uses basic supplies. Paper, glue, and a frame are often enough. This makes it easy for many people to try at home. Families also like making it together. Each layer can be cut and placed step by step. The final piece becomes a shared holiday memory.
Materials and Tools You'll Need
You need a shadow box frame or a deep picture frame that can hold space for layers, along with sturdy cardboard or thick paper that will form the base of each scene layer, printed nativity designs that you can cut and arrange, scissors for larger cuts, a craft knife for small and detailed shapes, glue or double-sided tape to keep everything fixed in place, black paper for strong silhouette outlines, colored paper if you want soft detail and contrast, a ruler to help keep lines straight and spacing even, a pencil for tracing the design before cutting, a cutting mat to protect your surface while working, and small LED lights or fairy lights that sit behind the layers to create a warm glow through the finished shadow box.
Choosing the Right Nativity Design
A nativity shadow box starts with the right design. The design sets the mood. It also shapes the final look of your craft. Simple choices work best for clean results.
Traditional Holy Family Scenes
This style shows Mary, Joseph, and baby Jesus. It often includes a stable and soft light. The focus stays on the main figures. This design works well for a calm and classic look. It also fits many holiday decorations.
Bethlehem and Manger-Themed Backgrounds
This style adds more detail in the background. You may see Bethlehem buildings, stars, or hills. A manger scene brings depth to the shadow box. Layers help create space between each part of the design. This makes the final piece look more real.
Selecting a Design That Matches Your Frame Size
Frame size guides your design choice. A small frame works better with fewer details. A larger frame allows more layers and elements. Check the depth of your box before you start. This helps each layer fit well without crowding.
Planning the Layers for a Three-Dimensional Effect
A shadow box looks flat at first. Depth comes from planning. Each part needs its own space. Front, middle, and back all work together. This setup helps the scene feel real and full.
Understanding Foreground, Middle Ground, and Background
The foreground sits closest to the viewer. It holds the front pieces. These are often the first things seen. The middle ground sits behind the front layer. It carries key figures and main shapes. The background sits farthest back. It forms the base scene. It can show sky, walls, or stable shapes. Each layer plays a clear role. Keeping them separate helps the scene stay easy to read.
Creating Depth Through Layer Placement
Depth comes from spacing. Place some pieces closer to the front glass. Push other pieces farther back. Small gaps between layers help. These gaps let light and shadow work together. Different paper cuts or foam spacers can hold each layer in place. This keeps the structure steady inside the box.
Arranging Nativity Elements for Visual Balance
Balance keeps the scene calm and clear. Place key nativity figures in a way that feels even across the space. Avoid crowding one side. Spread elements so each part has room. The focal point often sits near the center or slightly off-center. Supporting pieces should guide the eye toward it. Empty space also matters. It gives the design room to breathe and helps each figure stand out.
Preparing Your Templates and Materials
Good setup makes the rest of the work easier. This step keeps everything clear before cutting begins.
Downloading or Creating Nativity Templates
Start with a nativity design. Choose a simple layered style. Print it on sturdy paper. Cardstock works well. Hand drawn designs also work. Keep each layer clear so shapes do not blend together.
Tracing and Printing Design Layers
Place each template on your paper. Trace each part with care. Use light pencil lines. Dark lines can show later in the final piece. Print settings should stay sharp so edges stay clean and easy to follow.
Organizing Pieces Before Cutting
Lay all printed sheets on a flat surface. Sort each layer in order. Keep small parts together in one place. Group pieces by design level. This helps avoid confusion during cutting and assembly.
Cutting the Nativity Layers
Cutting each layer starts with clear lines. Keep every shape steady on the material. Move slowly along the design edges. Steady hands help each piece stay clean. Sharp blades help create neat cuts. Dull blades can tear edges. Change blades often for better control. Keep tools stable on the work surface. Keep paper or material flat during cutting. Raised edges can shift the design. A firm surface keeps shapes true.
Use a light pencil mark for guides. Dark marks can show after finishing. Follow the outline step by step. Small cuts work better than long cuts. Short movements give more control. Clean edges come from patient work. Keep fingers away from the blade path. Use a ruler for straight lines. Hold tools with a steady grip.
Cardstock needs light pressure. Too much force bends the sheet. Smooth cuts come from gentle motion. Wood needs a stronger blade. Slow movement helps avoid splinters. Sand small rough edges after cutting. Acrylic needs steady pressure and slow cutting speed. Heat can build up during cutting. Short breaks help keep the material stable. Each material reacts in a different way. Adjust pressure based on the surface. Careful handling keeps shapes clean.
Rushing leads to uneven edges. Slow work keeps shapes consistent. Skipping blade changes leads to rough cuts. Fresh blades improve control. Loose material shifts during cutting. Secure placement keeps designs aligned. Sharp corners need extra care. Slow movement keeps corners smooth. Each step shapes the final look. Care and focus support clean results.
Assembling the Layered Nativity Shadow Box
The shadow box comes together in steps. Each layer builds depth. Work with care. Small details matter in this part.
Start with the back panel of the frame. Place the background sheet inside the frame first. Keep it flat against the surface. Line up the edges with the frame sides. Press it gently so it stays in place. The background sets the base for all other layers.
Foam spacers sit between each layer. Cut the foam into small strips. Place them along the back of the next design piece. Keep spacing even across the surface. This helps each layer stand apart. The space between layers gives the scene a 3D look.
Place the next design layer over the foam strips. Line it up with the background. Check the position from all sides. Press down gently so the foam holds. Move step by step through each layer. Keep each piece centered before moving forward.
Place the finished layers into the frame body. Press it in slowly. Make sure nothing shifts out of place. Close the frame backing. Secure the clips or fasteners. The layered nativity scene now sits firmly inside the frame.
Adding LED Lighting for a Glowing Effect
LED lighting brings soft light to the nativity shadow box. The layers become easier to see. The scene gains depth. The glow helps each cut shape stand out without harsh brightness.
Choosing the Best Lights for Shadow Boxes
Small LED strip lights work well for this project. Battery-powered fairy lights also fit inside tight spaces. Warm white light gives a calm tone. Cool white light gives a brighter look. Both can work depending on the style you want for the nativity scene. LED puck lights offer another option. They give steady light in one spot. They suit deeper boxes with more layers.
Positioning Lights for Even Illumination
Place the lights behind the back layer. This helps the glow spread forward through the design. Keep lights away from direct contact with paper or thin board. Spread the lights across the frame instead of placing them in one area. This helps reduce dark spots. Adjust the angle so each layer receives light. Small changes in placement can change how the full scene appears.
Concealing Wires and Battery Packs
Hide wires along the back edges of the box. Tape or clips keep them in place. Paint or dark paper can help blend them into the background. Battery packs can sit behind the frame or under the box. A small pocket inside the back panel can also hold them. Keep access simple so batteries can be changed without trouble.
Personalizing Your Nativity Shadow Box
A nativity shadow box can carry a personal touch. Small details make it feel meaningful. Each choice adds more connection to the holiday season.
Adding Names, Dates, or Scripture Verses
Names bring a family touch to the display. A date can mark a special year. Scripture verses add meaning and focus. These details can be placed on small tags or inside the layers of the box. Simple lettering keeps the look clean and easy to read.
Incorporating Decorative Borders and Embellishments
Borders can frame each layer of the scene. Paper edges, soft trims, or simple cut patterns help define the space. Small accents can sit in corners or along the sides. These details should stay light so the main scene remains clear.
Choosing Colors and Finishes to Match Your Holiday Decor
Color choice sets the mood of the shadow box. Soft neutrals create a calm look. Rich reds and greens bring a classic holiday feel. A matte finish gives a soft style. A slight shine adds more depth. Matching these choices with home decor helps the piece fit naturally in any room.
Creative Display Ideas for the Holiday Season
A layered nativity shadow box fits many spaces. It brings depth and a warm holiday feel. Small lights or soft tones make it stand out in a calm way.
Decorating a Fireplace Mantel
A fireplace mantel offers a strong focal point in a room. Place the shadow box at the center of the mantel. Add simple items on each side like small candles or greenery. Keep the space clean so the shadow box draws attention. Soft lighting nearby helps the layers stand out.
Creating a Festive Tabletop Display
A tabletop display works well for dining or coffee tables. Set the shadow box on a flat surface. Surround it with small seasonal accents like pine sprigs or tiny ornaments. Keep the arrangement low so it does not block view across the table. A neutral tablecloth helps the scene feel balanced.
Hanging Your Shadow Box as Wall Art
Wall placement turns the shadow box into a focal art piece. Choose a clear wall space with light nearby. Mount it at eye level for easy viewing. Keep nearby decor simple so the details inside the box remain the focus. Soft wall lighting or nearby lamps help add depth to the layers.
Giving It as a Handmade Christmas Gift
A handmade shadow box works well as a personal gift. Wrap it in simple paper or place it in a sturdy box for protection. Add a short handwritten note for a personal touch. The layered design makes it a meaningful item for home decor during the holiday season.
Common Mistakes to Avoid
Crowding the design is a common issue. Too many elements can hide the layered effect and make the scene feel flat. Wrong lighting can also reduce the impact. Harsh light washes out details, while very dim light hides them. Soft, even light helps each layer stay visible. Skipping planning leads to uneven placement. Without a clear layout, pieces may not line up well and the depth effect gets lost.
Using thick or bulky materials can create spacing problems inside the box. Thin, clean-cut layers work better for a sharp look. Ignoring balance makes one side feel heavier than the other. Spacing elements evenly keeps the scene steady and easy on the eyes.
How to Care for and Store Your Nativity Shadow Box
Keep your nativity shadow box in a dry place. Moist air can damage paper and glue. A closet shelf works well. Keep it away from windows and sinks. Dust can build up over time. Use a soft dry cloth to gently clean the glass or front cover. Do not press hard. Small details inside can bend or shift. Avoid direct sunlight. Strong light can fade colors and make paper look dull. A shaded spot keeps the design fresh for longer.
Handle the box with clean hands. Oils from skin can leave marks on glass or frames. Hold it by the edges for better control. When the holiday season ends, prepare it for storage. Wrap the shadow box in soft paper or bubble wrap. This adds a layer of protection. Place it in a sturdy box that fits its size. Fill empty spaces with soft material so it does not move around.
Do not stack heavy items on top. Pressure can crack the frame or flatten layered parts inside. A cool, dry storage area works best. Avoid attics and basements since temperature changes can harm materials. Careful handling helps the nativity shadow box stay beautiful year after year.
Benefits of Making Your Own Layered Nativity Shadow Box
Making your own shadow box gives you full control over the final look. You choose the colors, paper, and layout. It costs less than many store bought decorations. Simple materials can still give a clean result. You can adjust every layer to match your style. Each piece can look exactly how you want it.
It helps you build a personal holiday decoration. The final piece feels more meaningful because you made it yourself. It works as a fun hands on project. Cutting and layering paper can keep your focus on each step. It also becomes a display piece for your home. You can place it on a shelf, table, or wall for the season.
Final Notes
A layered nativity shadow box brings depth to a simple holiday scene. Each layer adds shape and space. Light behind the frame makes soft shadows that give life to the design. The full piece feels calm and meaningful in any room. Clear planning shapes the result. Separate each layer into front, middle, and back. Keep spacing even so the scene stays open and easy to read. Clean cuts help every shape stand out. Sharp tools and slow work support better edges.
Soft LED lighting works well behind the layers. Warm light spreads through the paper and highlights each detail. Placement of the lights changes how the full scene appears. Even light across the back keeps dark spots away. Balance keeps the design steady. Place figures so both sides feel even. Leave open space so the main focus stays clear. Too many pieces can block the depth effect.
Care after finishing keeps the shadow box in good shape. A dry and shaded place protects the paper and frame. Gentle cleaning removes dust from the front. Soft wrapping during storage keeps the layers safe until the next season. A handmade nativity shadow box becomes a lasting holiday display. Each part reflects time and attention placed into the work.
FAQs:
What is a layered nativity shadow box?
A layered nativity shadow box is a framed art piece. It uses stacked paper layers to show the nativity scene. Each layer sits behind another to form depth inside the frame.
What materials are used to make it?
Cardstock, printed nativity templates, scissors, a craft knife, glue or tape, and a deep frame are common supplies. Foam strips help separate layers. LED lights add a soft glow behind the design.
How many layers work well for this craft?
Three to seven layers work well for most designs. Fewer layers keep the scene simple. More layers add depth and detail inside the frame.
What type of lighting works well inside the box?
Small LED strip lights and fairy lights work well. Warm white light creates a soft glow through the paper layers. Lights sit behind the back panel for even brightness.
How long does it take to finish one?
Time depends on detail and cutting work. Simple designs take a few hours. More detailed scenes take longer due to careful cutting and layering.
How should it be stored after the holiday season?
A dry storage space keeps the frame and paper safe. Soft wrapping protects the layers. A stable box helps prevent movement and damage during storage.