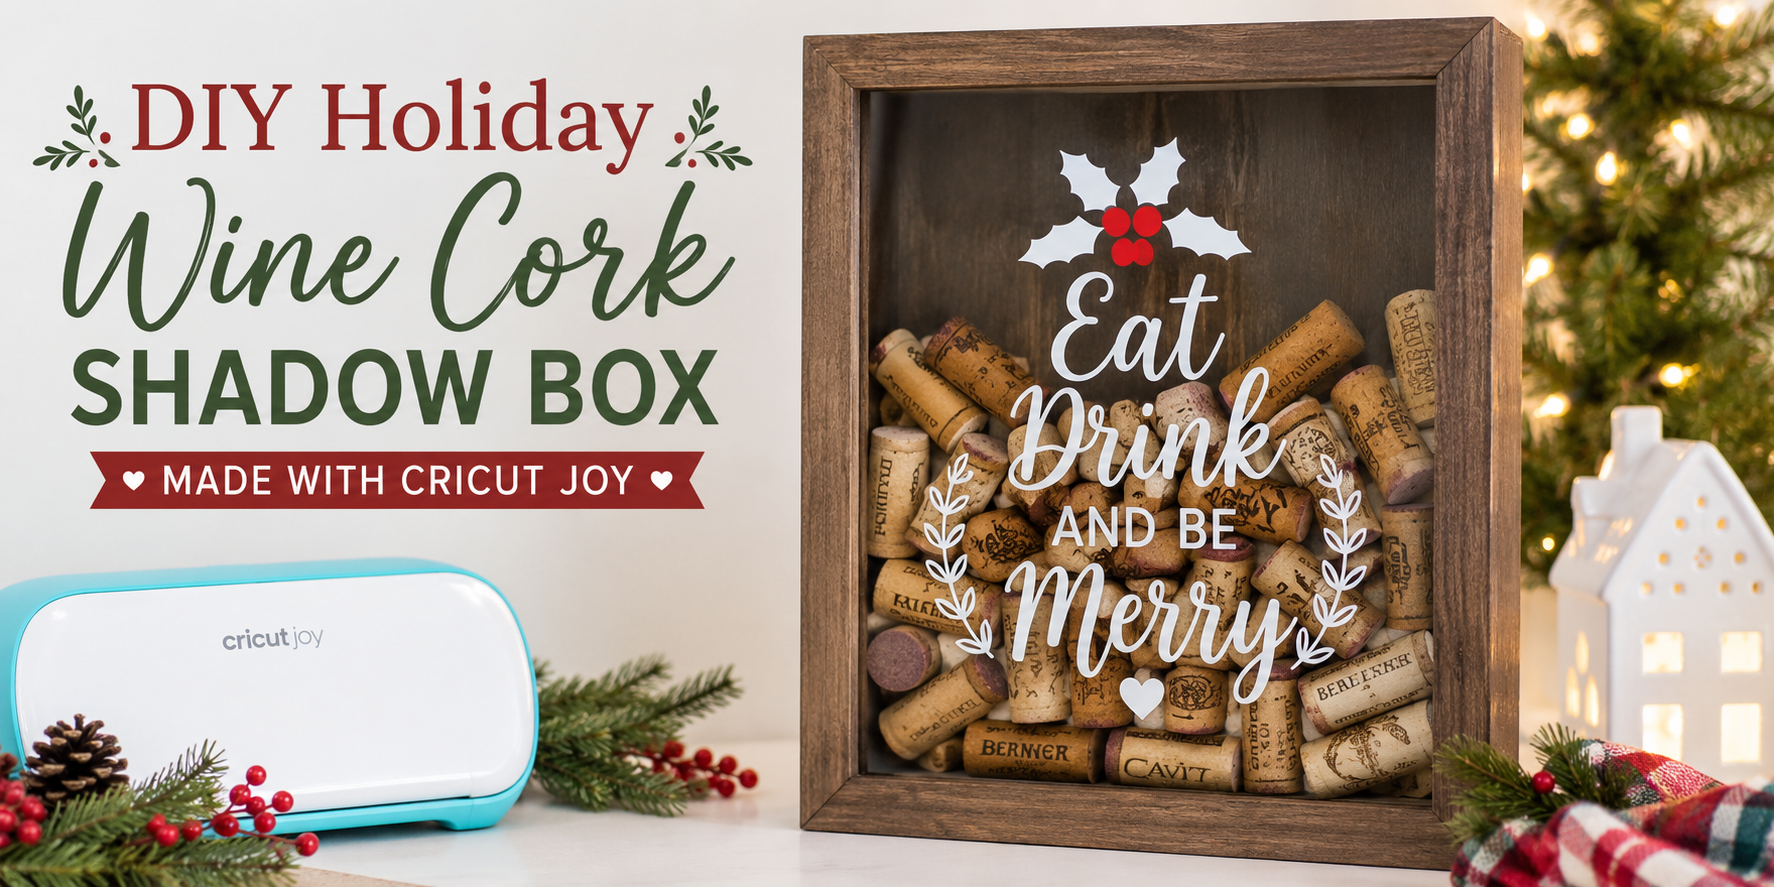
How to Make a DIY Keepsake Wedding Anniversary Shadow Box
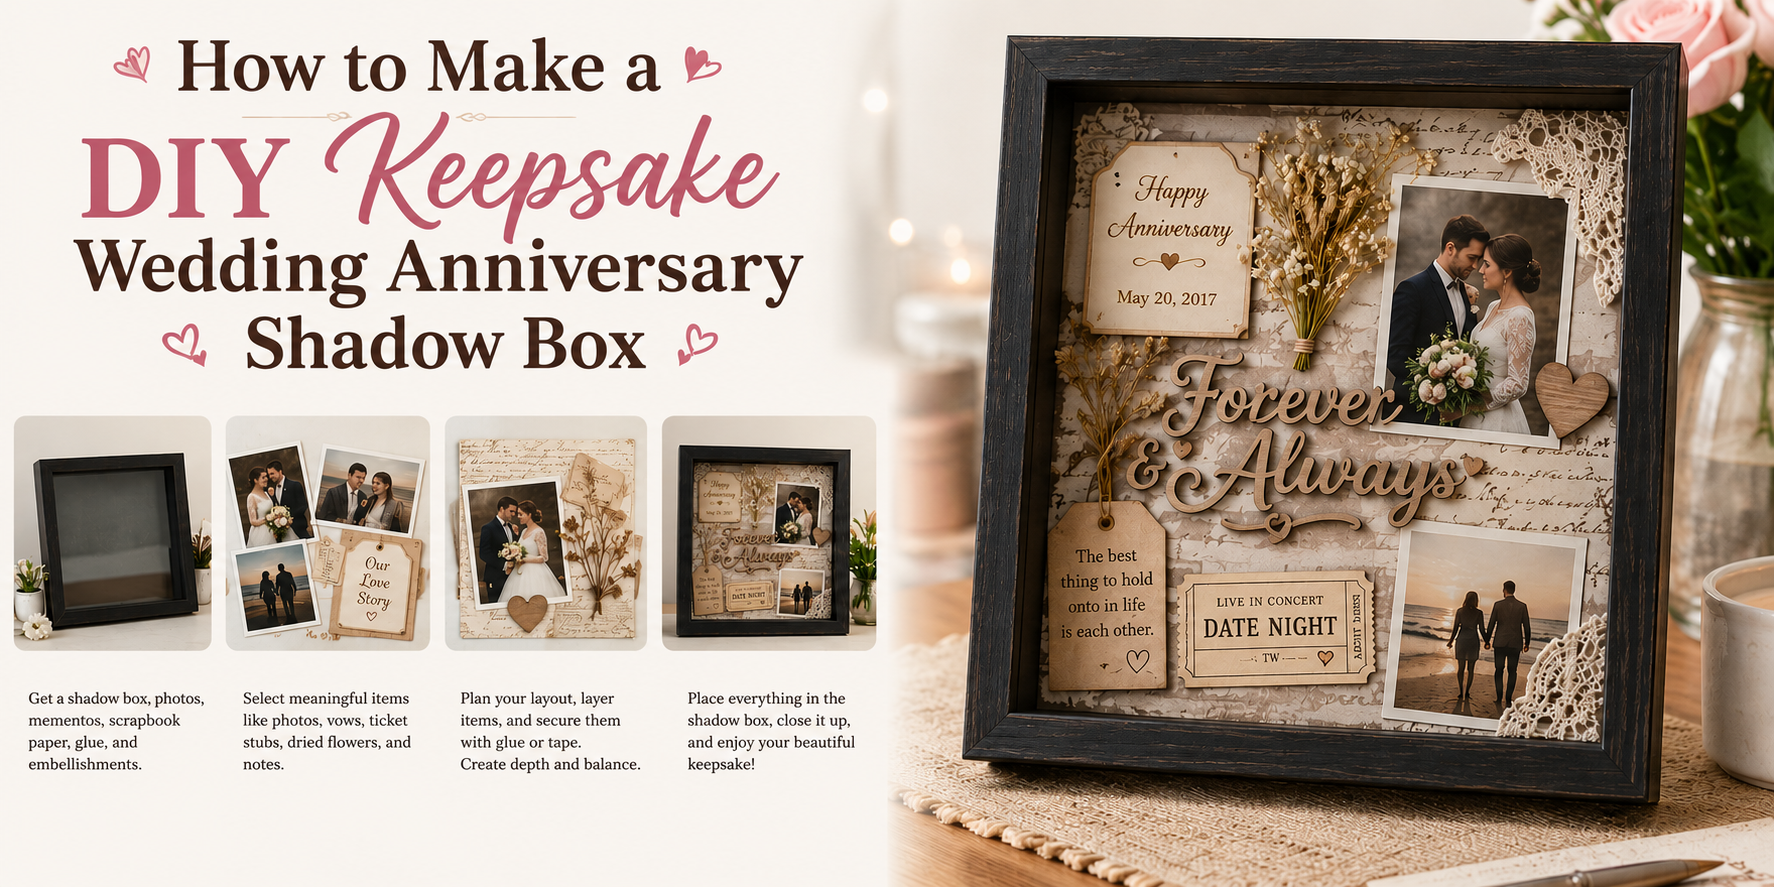
Wedding memories deserve a lasting display. A DIY anniversary shadow box turns photos, vows, and small keepsakes into a framed story you can see every day. It brings wedding details into one place and keeps those moments easy to revisit. This simple project feels personal.
Next, a shadow box helps you protect delicate keepsakes while creating a display for your home. This guide shows clear steps to build your own design from start to finish. You will also find ideas for layouts, materials, and meaningful ways to personalize it. By the end, you can create a keepsake that reflects your wedding story and lasting bond. Start with your favorite memories today.
What Is a Wedding Anniversary Shadow Box?
A wedding anniversary shadow box is a deep frame used to hold special items. It helps save memories from a wedding day or years together. People place small keepsakes inside it. Photos, cards, dried flowers, and invitations are common choices. Some also add rings, vows, or small gifts. The box has a glass front. This keeps the items safe and visible. It can hang on a wall or sit on a shelf. Each shadow box tells a story. It shows moments that matter in one simple display.
Why Couples Love Shadow Boxes
Couples like shadow boxes because they hold shared memories in one place. They help tell a shared story in a simple way. Photos, notes, and small items fit inside. Each piece adds part of the story. A ticket stub, a note, or a small keepsake can carry meaning from a special day. These boxes often display wedding and anniversary moments at home. Many sit on shelves or hang on walls where they stay easy to see. They bring back shared moments from different times. Each look can bring up a memory tied to the items inside. They also make a home feel more personal. The display reflects shared experiences and time spent together.
Benefits of Preserving Wedding Memories
Wedding memories fade fast in daily life. A shadow box helps keep them close. It turns small items into something you can see every day. You can hold on to real pieces from the wedding. A photo, a flower, or a ribbon can bring the day back in a simple way. These items carry strong feelings. The display also helps tell your story. Each piece adds a part of the day. Together, they show what mattered most.
It also brings comfort during quiet moments. Looking at it can bring back happy thoughts. It can feel like a small pause in a busy day. A shadow box also keeps memories safe. Items stay protected from damage or loss. They last much longer this way. It also works as home decor. You can place it on a wall or shelf. It adds a personal touch to any space.
Popular Anniversary Shadow Box Styles
Anniversary shadow boxes come in many styles. Each one tells a different story. Some focus on romance. Some focus on memories. Others focus on shared milestones. A classic style uses wedding items. People often include a wedding photo, invitation, and dried flowers. These items bring back the wedding day in a simple way. Many choose soft colors like white, cream, or gold.
A timeline style shows the journey of a couple. It may include photos from different years. It may also include small notes or dates. Each piece marks an important moment. A travel style works for couples who love trips. Tickets, maps, and small souvenirs fit well here. Each item shows a place visited together.
A hobby style highlights shared interests. It may include items like concert tickets, sports keepsakes, or craft pieces. These details show what a couple enjoys doing together. A minimal style keeps things simple. It uses fewer items and clean layouts. One or two strong pieces can carry the whole design. Each style gives a different way to save memories. The best choice depends on the story you want to show.
Supplies Needed for a DIY Anniversary Shadow Box
A shadow box helps keep special memories in one place where they can be seen every day and enjoyed for years, so gathering the right supplies before starting makes the whole process easier and helps the final design feel clean and balanced.
Essential Materials
The main item you need is a shadow box frame that will hold everything inside, and picking the right size matters because it should fit your photos and keepsakes without feeling too crowded or too empty, while still leaving space for decoration and layout. Inside the frame, a strong backing board like foam board or thick cardboard is needed to give support to everything you place, and this base also helps you plan the layout before anything is glued down so you can adjust the design until it feels right.
Photos are a key part of the design since they bring the story of the wedding or anniversary to life, and choosing clear images that show real moments like the ceremony, reception, or quiet memories will make the shadow box more personal and meaningful. Small keepsakes also play a big role in the design because items like wedding invitations, dried flowers, ribbons, or ticket stubs can add real texture and emotion, helping the box tell a fuller story beyond just pictures.
Decorative Embellishments
Decorative pieces help fill empty spaces and make the shadow box more visually balanced, so paper cutouts, colored cardstock, and patterned sheets can be placed behind or around items to add depth and interest without taking focus away from the main memories.
Ribbons can be added to bring soft lines and color into the design, and placing them across corners or around photo edges can help guide the eye through the box in a gentle way that feels natural. Small stickers, letter tiles, or printed words can be used to show names, wedding dates, or short messages, and these small details often become focal points because they add meaning in a simple way.
Choosing Keepsakes for Your Shadow Box
A wedding anniversary shadow box holds memories in one place. Each item adds meaning and tells part of the story. Pick pieces that bring back real moments from the day.
Wedding Photos
Photos bring life to the shadow box. Choose clear shots that show emotion and key moments. A first look, the ceremony, or a joyful laugh all work well. Small prints fit best and leave space for other items.
Invitations and Stationery
Wedding invitations set the tone of the event. Save a copy of the invite, RSVP cards, or place cards. These pieces show the style and details of the celebration. They also add structure to the layout inside the box.
Dried Wedding Flowers
Dried flowers add color and texture. Flowers from the bouquet or boutonniere work well. Press or dry them before placing them in the box. Keep them flat so they stay in good shape over time.
Love Letters and Vows
Handwritten vows or letters carry strong meaning. The words show feelings from that day. Place them in the center or fold them neatly for a soft look. A printed copy also works if the original is too fragile.
Anniversary Memorabilia
Small items from the anniversary can join the display. Ticket stubs, small gifts, or a note from the day add a new layer to the story. These pieces connect past and present in one frame.
Planning Your Shadow Box Layout
A wedding anniversary shadow box tells a story. The layout decides how that story feels. Each piece needs a clear place. The goal is a clean and meaningful design.
Selecting a Theme
Start with one main idea. A theme keeps everything connected. It can focus on the wedding day, shared memories, or special milestones. Choose items that match that idea. Photos, notes, and small keepsakes work well. Each item should support the same story.
Creating a Focal Point
One item should stand out. This becomes the center of attention. A wedding photo often works well here. Place the focal point where the eye goes first. Keep space around it. This helps it stand out without distraction.
Balancing Colors and Textures
Colors need harmony inside the box. Too many bold colors can feel messy. A simple color mix keeps the design calm. Textures add interest. Paper, fabric, and small objects create contrast. Spread them across the layout so one side does not feel heavy.
Layering Items for Depth
Flat layouts can look plain. Layering adds depth and dimension. Place some items in the back and others in front. Use small spacers or mounts to lift pieces forward. This creates a stacked look. The shadow box then feels more alive and detailed.
How to Make a DIY Keepsake Wedding Anniversary Shadow Box
Step 1: Prepare the Shadow Box Frame
Pick a shadow box frame with enough depth for items. Clean the glass and inside area. Lay the frame flat on a table. Remove the back panel. Set all parts in a safe spot.
Step 2: Create the Background
Choose paper, fabric, or cardstock for the base. Cut it to fit the back panel. Keep edges smooth and even. Attach the background to the panel with glue or tape. Press it down so it stays flat.
Step 3: Arrange Photos and Keepsakes
Place photos and small items on the background. Move them around until the layout feels right. Keep space between each item. Check how everything looks together before fixing anything in place.
Step 4: Add Decorative Elements
Add small details like paper cutouts, ribbon, or pressed flowers. Place them around the photos and keepsakes. Keep the design balanced. Avoid covering important items in the frame.
Step 5: Secure Everything in Place
Use glue dots, tape, or small pins to hold items. Press each piece gently so it sticks well. Check each corner and edge. Make sure nothing shifts when the frame moves.
Step 6: Assemble and Close the Frame
Place the finished back panel into the shadow box. Fit it into the frame carefully. Lock the back in place. Wipe the glass to remove fingerprints. The shadow box is ready to display.
Personalizing Your Anniversary Shadow Box
A shadow box tells a story. Small details make it feel personal and real. Each item inside can hold a memory from the wedding day and the years after.
Add Names and Wedding Dates
Names bring a personal touch right away. Place both partners’ names in a clear spot. Add the wedding date under the names. This helps mark the start of the shared journey. Simple lettering works best. It keeps the focus on the meaning behind it.
Include Meaningful Quotes
A short quote can express strong feelings in a few words. Pick words that connect to the relationship. It can be a line from a wedding vow or a shared saying. Keep the text short so it fits well in the frame. Place it where it is easy to read.
Showcase Anniversary Milestones
Milestones show growth over time. You can add small notes for each year together. Include dates like the first home, trips, or big life events. These pieces turn the box into a timeline of shared memories. Each one adds depth to the story.
Incorporate Special Symbols
Symbols add visual meaning without many words. Hearts, rings, or simple shapes work well. Some people add fabric from the wedding dress or suit. Others include dried flowers from the ceremony. These small pieces bring emotion into the design.
Creative Wedding Anniversary Shadow Box Ideas
A wedding anniversary shadow box holds memories in one special place. It keeps small items safe and easy to view. Each design tells a different story. Here are some simple ideas to guide your project.
Rustic Anniversary Shadow Box
Wood tones set a warm and natural feel. Burlap, twine, and dried leaves fit well here. A handwritten note adds a personal touch. Old photos with soft edges complete the look. This style feels calm and homey.
Modern Minimalist Design
Clean lines keep the focus on key items. A white or black frame works well. One or two photos stand out best. Small labels keep details clear. Empty space plays a strong role in this design. The result feels neat and simple.
Vintage-Inspired Keepsake Display
Old-style frames bring a classic feel. Sepia photos match this theme well. Lace, old tickets, or letters fit right in. Soft colors help set a timeless mood. Each piece feels like a memory from the past.
Floral-Themed Memory Box
Dried flowers add color and texture. Roses or petals from a special day work well. Soft pastel backgrounds support the theme. A small ribbon can tie items together. This style feels gentle and romantic.
Milestone Anniversary Shadow Box
Big anniversaries call for bold displays. Numbers marking the year stand out inside the box. Photos from different years show the journey. Small keepsakes from trips or events fit well. Each piece marks a step in time.
Common Mistakes to Avoid
Overcrowding the Design
A shadow box needs space to breathe. Too many items make it look messy. Pick a few key pieces that tell the story clearly. Leave open space so each item stands out.
Using Weak Adhesives
Weak glue can fail over time. Items may fall or shift inside the box. Use strong, safe adhesives made for crafts. Check that each piece stays firmly in place before closing the frame.
Ignoring Preservation Methods
Wedding keepsakes can fade or lose shape. Paper can yellow. Fabric can weaken. Use acid-free paper and protective materials to help items last longer. Keep the box away from direct sunlight and moisture.
Choosing the Wrong Frame Size
A frame that is too small forces items to overlap. A frame that is too large can make the design feel empty. Match the frame size to the number and size of your keepsakes so the layout feels balanced.
How to Display Your Finished Shadow Box
Your shadow box is now ready. Place it somewhere safe first. Make sure nothing shifts inside. A wall display works well. Pick a clean spot. A hallway or bedroom wall can work. Keep it away from direct sunlight. Sunlight can fade the items inside. A shelf display is another option. Stand it on a flat surface. Use a stable base. Make sure it will not tip over. A mantel or bookcase can work well.
You can also group it with other keepsakes. Place it next to photos or small decor items. Keep spacing simple so it does not look crowded. Think about eye level. A shadow box is easier to enjoy when it is not too high or too low. Check it once in a while. Make sure the glass stays clean. Make sure items inside stay in place. Your display should feel calm and personal.
Tips for Preserving Wedding Keepsakes
Wedding keepsakes carry memories from a special day. These items need care so they last for years. Start by keeping items clean and dry. Dust and moisture can damage paper, fabric, and photos. Store everything in a safe place before placing it in the shadow box. Handle photos with clean hands. Oils from skin can leave marks. A soft cloth or gloves can help protect them. Use acid-free materials inside the shadow box. Acid-free paper and glue help stop yellowing and damage over time. This keeps colors fresh.
Keep the shadow box out of direct sunlight. Strong light can fade photos and fabrics. A shaded wall works better for display. Avoid placing the box in humid areas like bathrooms or kitchens. Dry air helps preserve the items inside. Check the shadow box once in a while. Make sure nothing has shifted or collected dust inside. These small steps help wedding memories stay safe and clear for years to come.
Final Verdict
A DIY wedding anniversary shadow box keeps wedding memories in one place. It brings photos, vows, and small keepsakes together in a clear display. Each item adds part of the story. The finished frame shows shared moments in a single view.
This project also protects items that hold meaning. Photos stay safe behind glass. Paper and fabric stay away from damage. The display keeps memories visible in daily life instead of stored away in boxes or albums.
Each design choice shapes the final result. Layout, color, and spacing guide how the story feels. A calm arrangement helps every piece stand out. Personal touches like names, dates, and small symbols make the box feel connected to real moments.
The final piece works as home decor and memory holder. It fits on a wall or shelf and stays part of the home. Each glance brings back parts of the wedding day and the years shared after it.
FAQs:
What is a wedding anniversary shadow box?
It is a deep frame used to hold wedding and anniversary keepsakes. It displays photos, vows, and small items in one place.
What items can go inside a shadow box?
Photos, wedding invitations, dried flowers, notes, and small gifts work well. Many couples also add tickets or fabric pieces.
How do I choose the right frame size?
Pick a frame that fits your items with space left for layout. A tight frame can feel crowded. A large frame can feel empty.
How do I keep items safe inside the box?
Use strong craft glue or glue dots. Acid-free paper helps protect photos and paper items. Keep the glass clean and closed.
Can dried flowers be used in a shadow box?
Yes. Dry or press them first. Keep them flat so they hold their shape and stay neat inside the frame.
Where should I place a finished shadow box?
A wall or shelf works well. Choose a dry area away from strong light. This helps protect colors and paper.
How long do shadow box keepsakes last?
Well-protected items can last for many years. Acid-free materials and careful placement help them stay in good condition.